


Please select the topic you'd like help with:
<< Go Back to the main page
The quick answer is, to use image files (ADF, DMS, IMG, IMA, ST, MSA, HDA, HDF, SCP) most of them will mount as a virtual drive simply by double-clicking them.
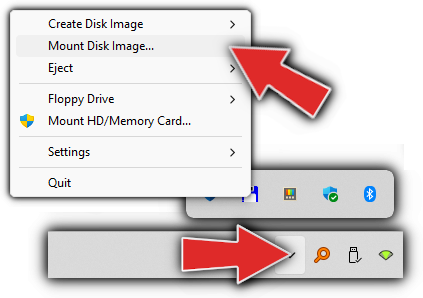
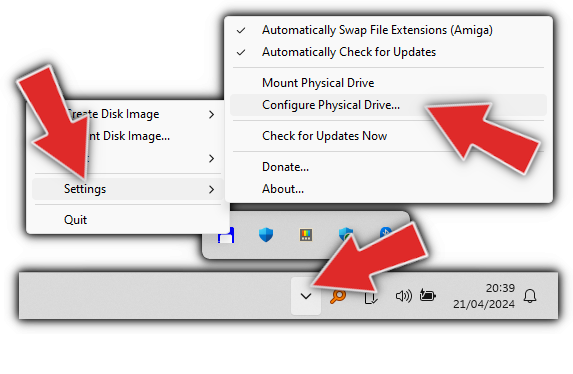
The other thing you should to is explore the special menu available from the taskbar as follows:

From that menu you can create disk images, mount drives, eject existing ones, setup real floppy drives and configure some other settings! Once a drive is mounted you can right-click it to control it.
Thats your quickstart in TLDR.
Back to Top!
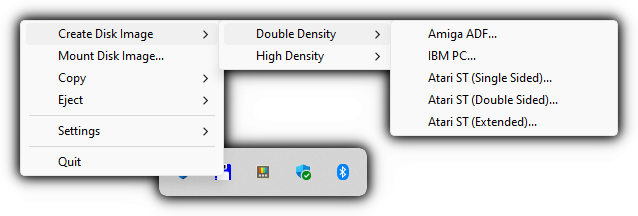
It's very easy to create a new disk image. If you look down at the task bar theres a special new icon.
And if you explore the options available there you'll discover these options!
There are two ways to use disk images. The first, if everything installed properly is to simply double-click on one.

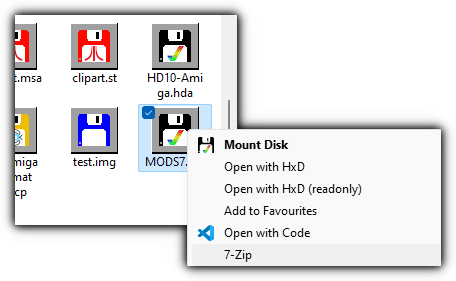
Also, if you right-click on one of these files you may also see a Mount Disk option, and failing that, the Open With option.
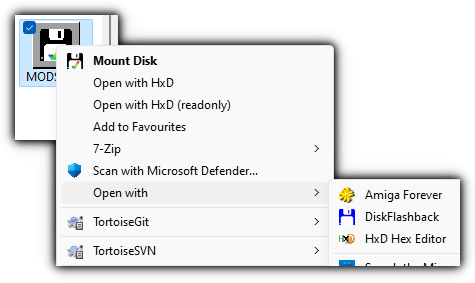
Finally, failing that, there's also a special menu available from the task bar that allows you to mount disks
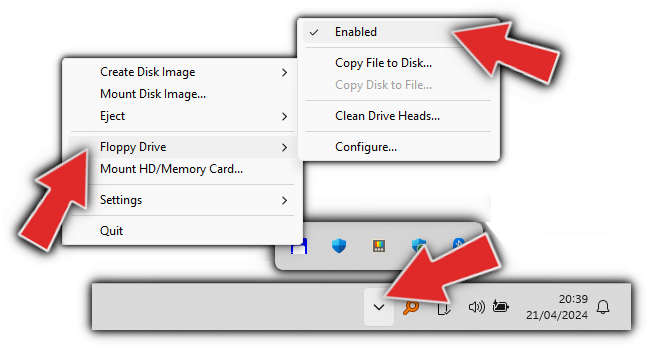
If you're the lucky owner of DrawBridge, Greaseweazle or SupercardPRO hardware then you'll be pleased to know you can now enable this as a Windows Drive Letter!. Enabling this is very easy. If you look at the bottom where the task bar is you'll discover the following:
Upon selecting that, the following dialog will appear:

This dialog works just like the one inside of the WinUAE Floppy Bridge plugin. You select the type of drive you have, which COM port it's on, what type of drive/cable it is, and which drive letter you'd like it to appear on. (A different one will be chosen if that one isn't available).
After you're happy with your selection, press OK.
Next, you need to enable your real drive, which is really easy, and will be remembered next time you boot Windows! Again, from the same menu as before, click the Enabled option so that a TICK appears before it.
If all goes to plan, a new drive letter will appear. Any disk inserted that is recognised will automatically be mounted!
NOTE: While this is enabled you will not be able to use any of the other tools that use this hardware. Some of those tools will automatically request use of the drive and will automatically unmount this temporarily.
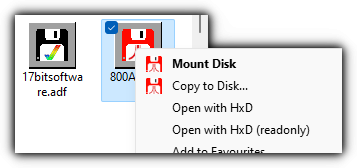
BONUS!!! While this is mounted, there will now be a few other options available to you. The left image is the menu you get when you right-click this new drive. The right image is the context menu for disk image files while active! - Some very useful features here...
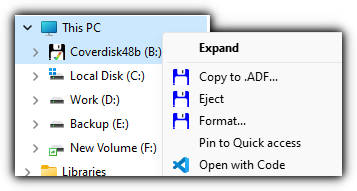
The Eject option will un-mount the drive and disable mounting in future until you re-enable it. However theres no real need to use this.. You can safely remove a disk at any time as long as the drive light is not lit, and inserting a new disk will auto-mount it!
You may also have spotted the Format... option too.
With your real floppy drive running, you've already seen you can right-click an image file or drive and copy it to the other. One other way is the Copy options within the Floppy Drive menu as follows:
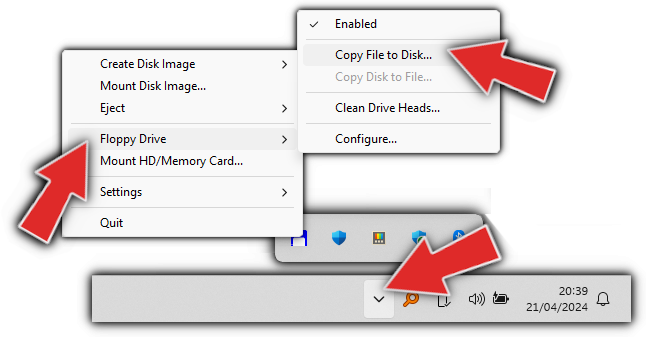
This works exactly like the other methods as it does exactly the same thing, it's just a different way to access this feature.
One you have your real floppy drive enabled and working, simply by right-clicking the drive icon you are presented with some extra options:
Clicking on the Format... option will display the following dialog:
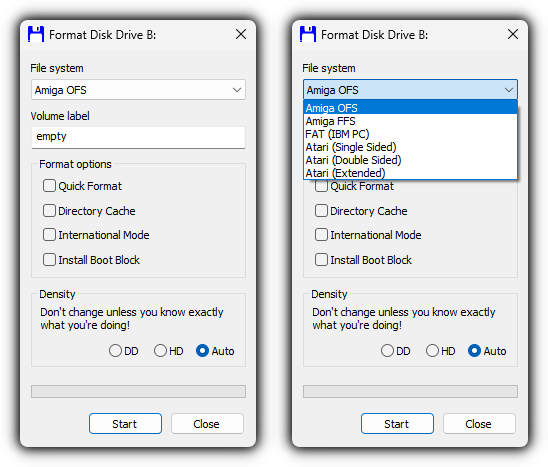
This isn't actually the real Windows format dialog, this is a special one, and you can see on the right-hand image that theres a different selection of file system options available.
WARNING Be very careful changing the density option. Whilst it's not possible for DiskFlashback to actually detect the type of disk inserted, it can guess by looking at the data. If you format a HD disk as DD or vice versa it won't read properly in the proper drive.
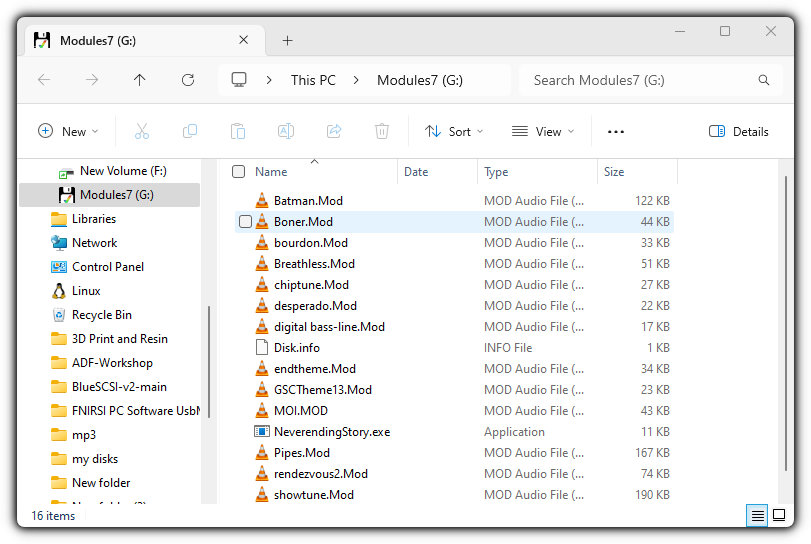
This is a very useful feature. I'm not exactly sure how common this is, but I found it fairly common on the Amiga to put the file type (extension) at the start of the filename and not the end.
Nothing wrong with that, but Windows doesnt detect the files correctly. Consider the following disk:
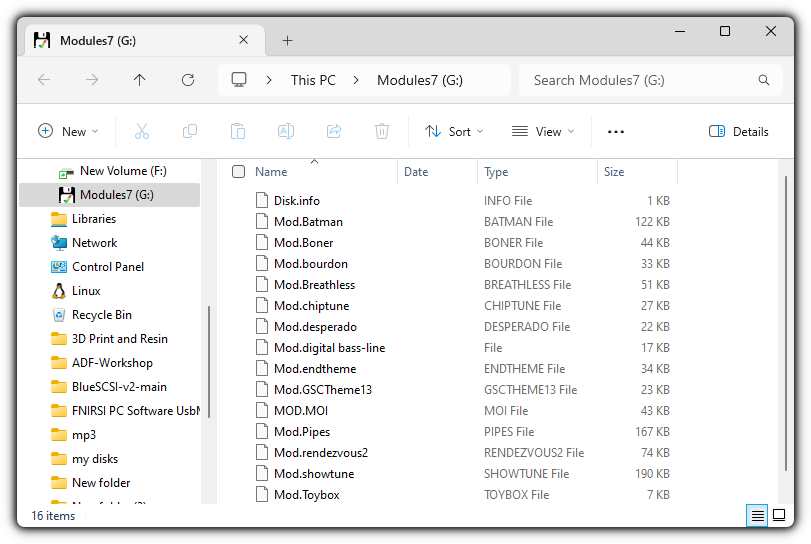
All of those music MOD files, and we know what they are, but poor old Windows doesn't have a clue. Its more of an annoyance than anything else, but theres a really easy solution. If you take a look at that special icon within the taskbar:
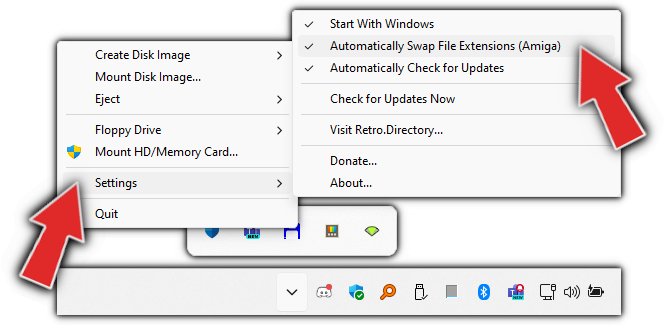
You'll spot an option for Automatically swapping file extensions. With this enabled, Explorer will instantly refresh the files, and the directory will now look like this:
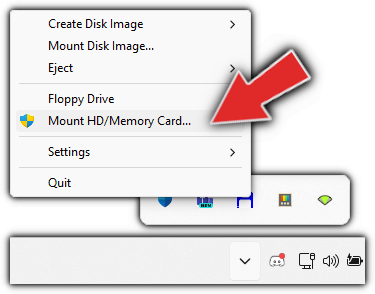
This option allows you to attempt to mount physical hard disks and memory cards as drives. This is not for image files, this is for actual disks.
Care must be taken here, as its possible you could corrupt your system files if this option is used incorrectly, although the software will attempt to make this almost impossible.
To use this option, use the Mount HD/Memory Card in the menu. Note you will require administrative privileges to use this feature.
Once clicked, and you have passed the UAC prompt, a dialog will appear, and it will immediately scan your system for drives that it think may contain Amiga data. It should try to ignore all system drives, and looks for Amiga partitions on normal drives, or drives that contain only Amiga systems.
This is an example of a memory card I use with the Pistorm32Lite that has three seperate Amiga partitions for me to use. And you'll notice it's recognised all of the file systems.
Simply choose the one you want and click Mount. If you are unsure, be sure to click the Read Only option first.
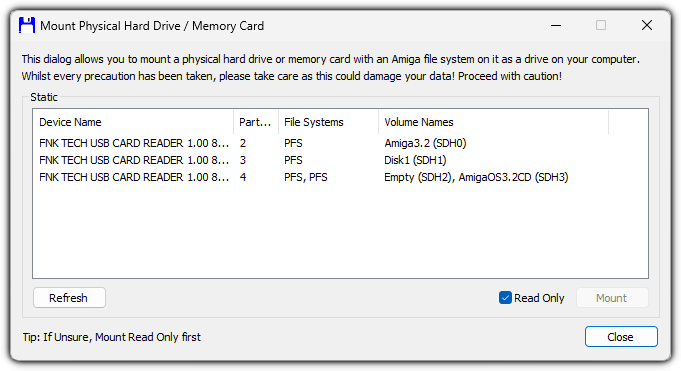
It's as simple as that. It can detect amiga OFS, FFS and PFS3 file systems making it easier to work out if you have selected the correct drive.
This is an example of a memory card that I used directly in my Amiga 1200, so this appears to Windows as a RAW unformatted drive, and will prompt to try and format it - don't!
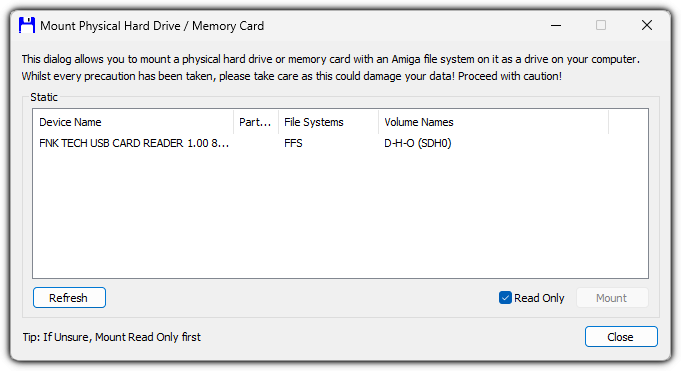
Note with this one, theres no partitions detected. This isn't formatted in a way that Windows can recognise it... but DiskFlashback can!
If you need more help or have further questions then join my Discord Server or, if you're interested, take a look at the source code.
Consider sending me a tip to say thanks!